How we made a Notion powered blog for our cycling app.
Learn how we created a blog that uses Notion as a content management system.
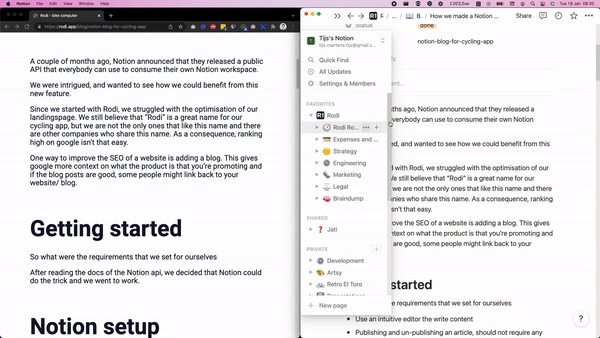
A couple of months ago, Notion announced that they released a public API that everybody can use to consume their own Notion workspace.
We were intrigued, and wanted to see how we could benefit from this new feature.
Since we started with Rodi, we struggled with the optimisation of our landingspage. We still believe that “Rodi” is a great name for our cycling app, but we are not the only ones that like this name and there are other companies who share this name. As a consequence, ranking high on google isn’t that easy.
One way to improve the SEO of a website is adding a blog. This gives google more context on what the product is that you’re promoting and if the blog posts are good, some people might link back to your website/ blog.
Getting started
So what were the requirements that we set for ourselves
Use an intuitive editor to write content
Publishing and un-publishing an article, should not require any changes to the code
Support markup and richt text formatting (titles, lists, links, code-blocks ....)
SEO-friendly url’s
After reading the docs of the Notion api, we decided that Notion could do the trick and we went to work.
Notion setup
The first thing we needed to do was creating a Notion database
We added the following columns
Name - the title of the blog.
Status - is not used in the code, but it’s handy to keep track of what’s the current status of an article in Notion.
Published - checking the checkbox will immediately publish that article.
Intro - a little description on what the article will touch.
Url - the author of the blog can choose what the slug of the url will be. (rodi.app/blog/[Url])

Hacking everything together
Our landing page is built using Next.js. I’ll not go into the details of the code and only cover some high level topics. But with the code snippets that are shown, you should be able to get an idea of what it takes to build a Notion powered blog. If you want to see all the code, you can check the pull request that added this blog to the website.
You can always find a “get started” and more details in the Notion docs.
Get all the published articles
First we want to get an overview of all the published articles.
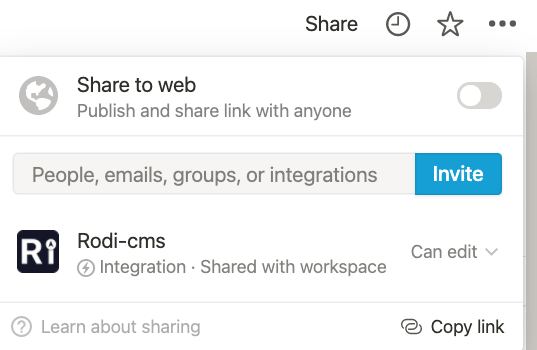
To be able to fetch items from our database, we need to share our database with our integration:
When this is done, we can start coding:
1
2
3
4
5
6
7
8
9
10
11
export const getBlog = async () => {
  const response = await notion.databases.query({
    database_id: process.env.notion_database_id,
  });

  const published = response.results.filter((blogPost) => {
    return blogPost.properties.Published.checkbox;
  });

  return published;
};
This is everything we need to fetch all our articles and filter the articles out that are not published yet.
Get the content of an article
Because we want to be able to find an article, based on the custom url. We need to fetch all the articles and it’s properties first.
When we have all the posts, we can look for the one that matches with the current url.
Now we can use the id of this article to fetch the content of a page. Note that there is a maximum of 100 blocks. This is a limitation set by the Notion API.
You’ll see that this is not the most performant/ideal solution imaginable, but given the requirements and technical limitations, it’s the best we can do.
For us, this was not that big of an issue as we can use “ Incremental Static Regeneration” from Next.js. Next will cache the response and will serve our blog within a blink of an eye. (Learn more how we implemented Incremental Static Regeneration in this pull request)
1
2
3
4
5
6
7
8
9
10
11
12
13
14
15
16
17
18
19
20
21
22
export const getPage = async (url: string) => {
  const allPosts = await getBlog();

  const blogId = allPosts.find(
    (blog) => blog.properties.Url.rich_text[0].plain_text === url
  )?.id;

  const page = await notion.pages.retrieve({ page_id: blogId });
  const title = page.properties.Name.title[0].plain_text;
  const intro = page.properties.Intro.rich_text[0].plain_text;

  const response = await notion.blocks.children.list({
    block_id: blogId,
    page_size: 100,
  });

  return {
    title,
    intro,
    content: response.results,
  };
};
Display the content
A Notion page consists out of lists of “blocks”, every block has a “type” that indicates if it’s normal text or if it’s a different type of component.
We can loop over all these blocks and render the appropriate React component.
If there is a type that’s not supported, nothing will be rendered.
1
2
3
4
5
6
7
8
9
10
11
12
13
14
15
16
17
18
19
20
21
22
23
24
25
26
27
28
29
30
31
32
33
34
35
36
37
38
39
40
41
42
43
44
45
46
47
48
49
50
51
52
53
54
55
const blogContent = useMemo(() => {
    return blog?.content?.map((block) => {
      switch (block.type) {

        case "paragraph":
          return (
            <Paragraph key={block.id}>
              {block.paragraph.text.map((text) => {
                if (text.href) {
                  return (
                    <A key={text.text.content} href={text.href}>
                      {text.text.content}
                    </A>
                  );
                }
                return text.text.content;
              })}
            </Paragraph>
          );

        case "heading_1":
          return <H2 key={block.id}>{block.heading_1.text[0]?.plain_text}</H2>;

        case "heading_2":
          return <H3 key={block.id}>{block.heading_2.text[0]?.plain_text}</H3>;

        case "bulleted_list_item":
          return <ListItem block={block} key={block.id} />;

        case "image":
          return (
            <ImageContainer key={block.id}>
              <StyledImage
                src={block.image.file.url}
                layout="fill"
                objectFit="contain"
              />
            </ImageContainer>
          );

        case "code":
          return (
            <CodeBlock
              key={block.id}
              text={block.code.text[0].plain_text}
              language={block.code.language}
            />
          );


        default:
          return null;
      }
    });
  }, [blog]);
Wrapping up
We set ourselves the following requirements
We can decide what content is and isn’t shown using the checkboxes
✅ Use an intuitive editor to write content
Notion is my favourite tool to write because of it’s ease of use.
✅ Publishing and un-publishing an article, should not require any changes to the code
Publishing and un-publishing is done by checking a checkbox in the Notion database, it’s a breeze.
✅ Support markup and richt text formatting (titles, lists, links, code-blocks ....)
For now titles, lists, links and code blocks are supported, if in the future this is not enough, We can easily add support for other components such as quotes.
✅ SEO-friendly url’s
We can fully customise the url’s to strategically use important keywords to further improve our SEO.
Demo
Managing what articles are shown
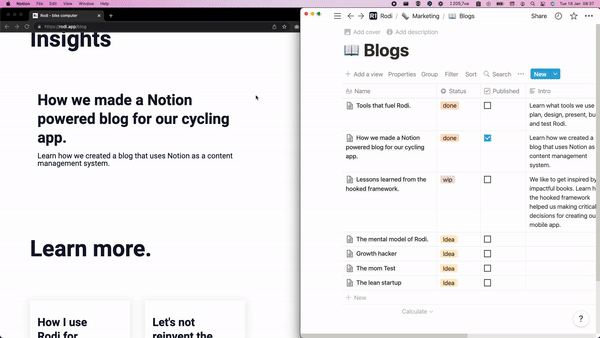
Managing the article